One of the intrinsic features that makes Khan unique is the concept
of multiple leaders. As long as a side has at least one leader (a bondsman
or a khan), the game goes on. This gives rise to many interesting tactical
gambits, which can lead to challenging game play.
In this sample game, black has only one leader left, so they must either
move the khan or thwart attacks when the leader is under threat:
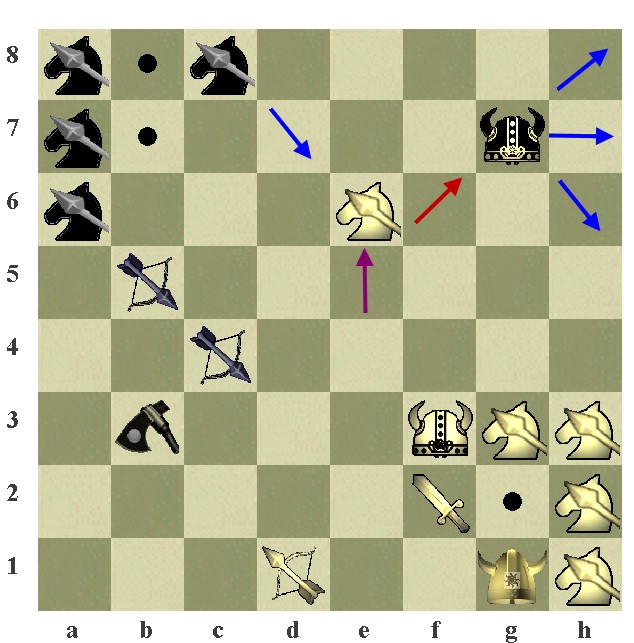
 In the above
diagram, WHITE has moved his warrior to E6 to attack the BLACK khan at
G7 (see red arrow threat).
In the above
diagram, WHITE has moved his warrior to E6 to attack the BLACK khan at
G7 (see red arrow threat). The blue arrows
show the options for black who must deal with the threat.
The blue arrows
show the options for black who must deal with the threat.Options: Black's khan can move to any of the 3 squares (H6,H7,H8) denoted in blue.
Black can also capture the offending piece (G7 x E6 or C8 x E6). These moves are denoted as [kxe6] or [wxe6].
The black khan cannot move to any other squares because it will be threatened by the white warriors at G3 or H3.
White under threat
The white khan, however is under no such limitations. Because white has a backup leader (the bondsman at G1), white can decide to move, attack, capture or keep the khan where it is, even when put under threat. Consider black's move to attack the khan with the assassin:

 White has
many options. They can play to any of the blue squares, or move a completely
different piece.
White has
many options. They can play to any of the blue squares, or move a completely
different piece. White with single leader
If the white bondsman were missing, the reality changes. White's only moves would be moving the khan to those squares shown in blue. The other squares, like F4 and F5 are protected by the black khan. And, if the khan tries to capture the black assassin, it will get eaten by the black archer at C4...
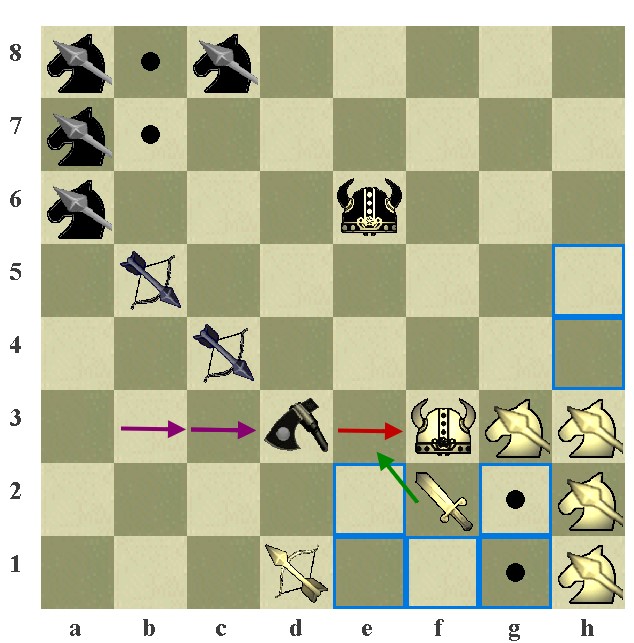
Or, the other option for white, is to block the assassin's threat with the sword (see green arrow).